


Step by Step Method to Draw Accurate Parallel Lines with a Set Square
A set square or triangle is an object used in engineering and technical drawing, with the aim of providing a straightedge at a right angle or another particular planar angle to a baseline.
The simplest form of a set square is a triangular piece of transparent plastic (or formerly of polished wood) with the center removed. More commonly the set square bears the markings of a ruler and a half-circle protractor.
Using a fixed square to draw parallel lines is an accurate method. A rectangular drawing tool called a "set square" is used to draw vertical lines, parallel lines, and some common angles. Lines that never cross each other are said to be parallel.
Parallel Lines
Two lines in the same plane that are equally spaced apart and never cross each other are said to be parallel lines in geometry. Both horizontal and vertical shapes are possible. Examples of parallel lines can be found everywhere, including zebra crossings, rows of notebooks, and the nearby railroad tracks.
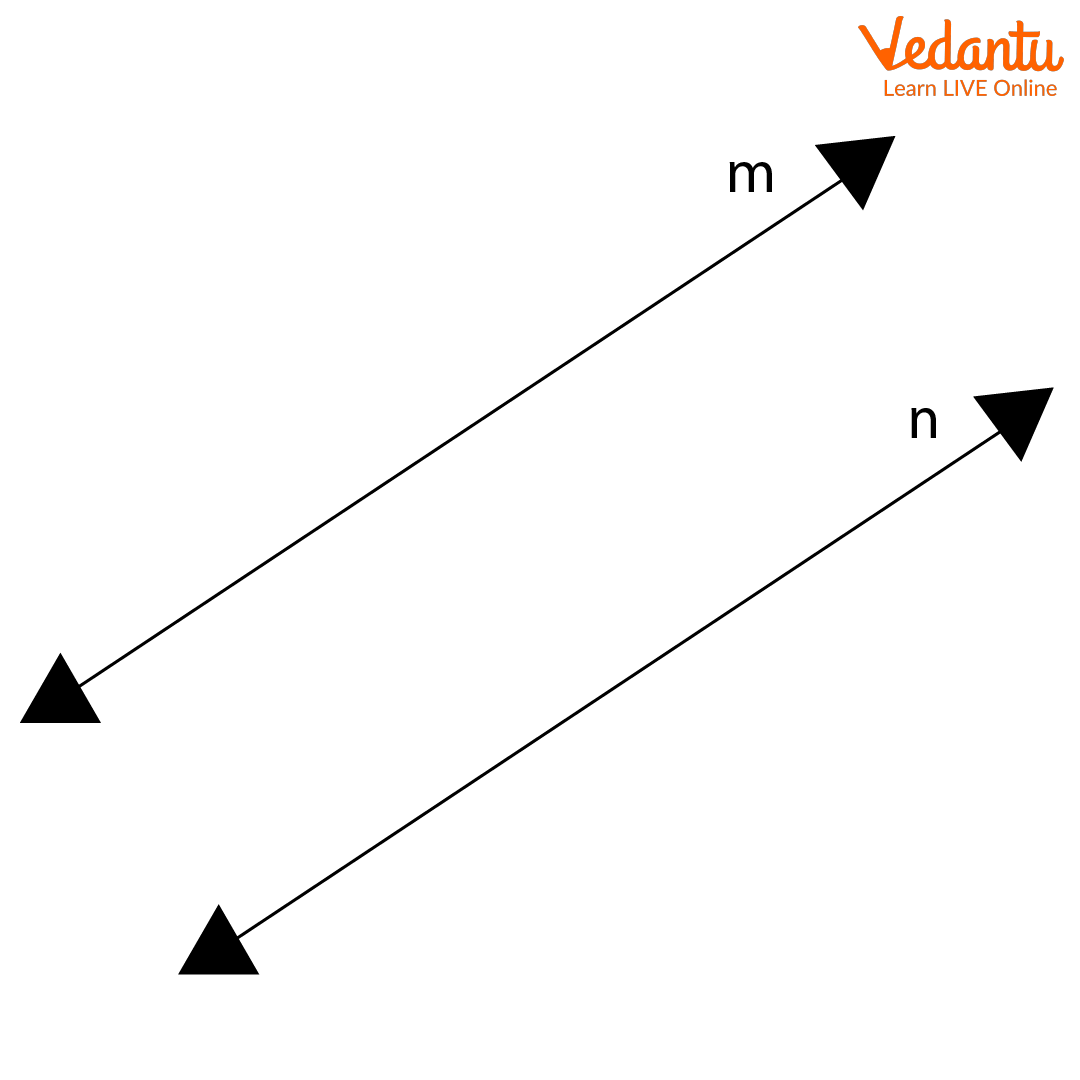
Parallel Lines
What is Set Square
A set square is used in technical drawings and math practice to represent predefined angles. Setting rectangles are typically made of thin plastic, wood, or, in rare cases, thin steel and have a triangular shape. Every plane represents three different angles, always containing one right angle. There are two common combinations of given set square angles: the \[{30^{^o}} - {60^o} - {90^o}\] option and the \[{45^o} - {45^o} - {90^o}\] option.
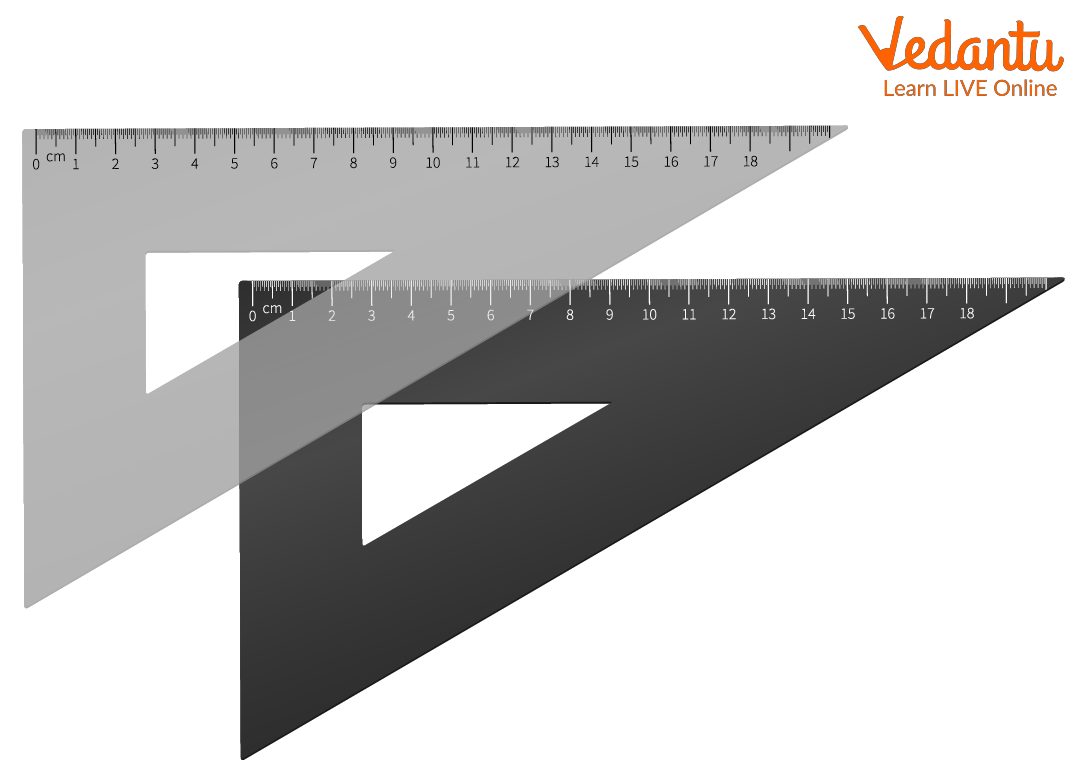
Set Square
Correct Use of Set Square
To use set squares correctly:
One side of the desired angle set must be set on a solid, level bottom line, such as the cross-arm of a T-square that is typically perpendicular to the paper and is oriented at a known angle.
The other edge of the established angle is then often marked off using a pencil or pen.
Use of Set Square
Following is the list of the uses of set square:
Draw a vertical line
Draw vertical corners
Draw a standard measurement angle [the two given rectangles are named after their angles; one is 90, 30, and 60 degrees, and the other is 90 and 45 degrees.
Parallel lines can be drawn with the help of set square
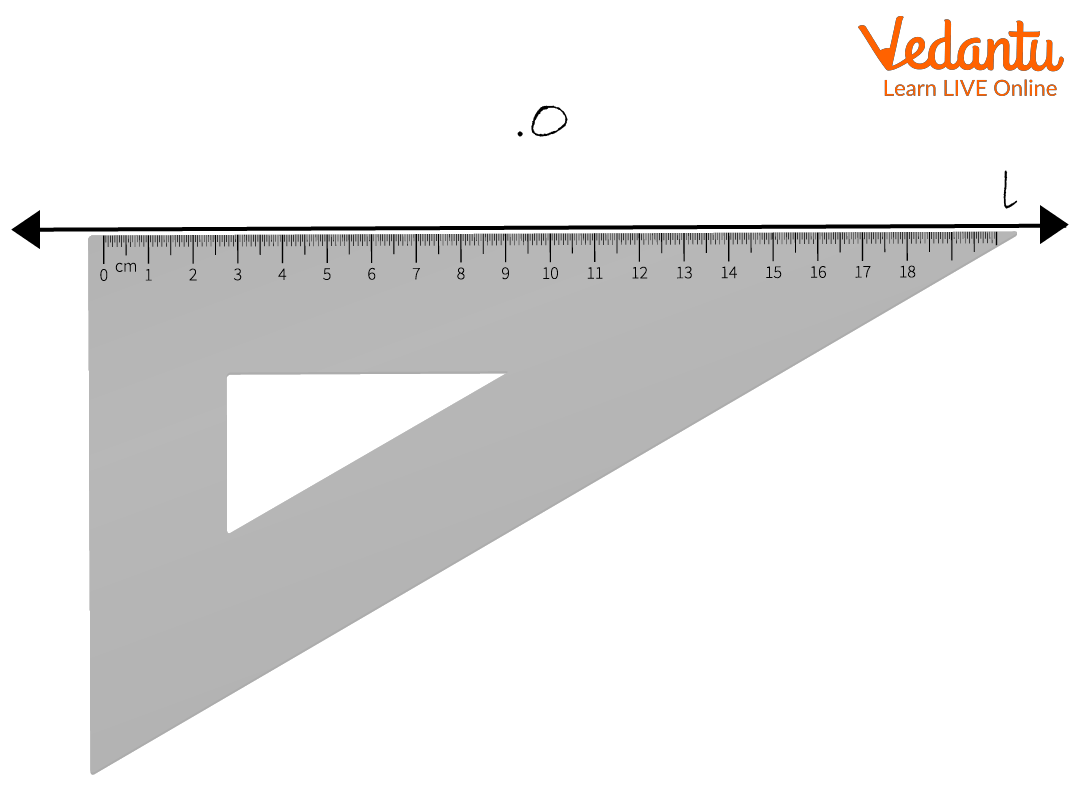
Drawing Parallel Lines Using the Set Square
1. Draw a line l and mark a point outside the line.
2. Place any side of the set square forming the right angle along line l.
Drawing a Line
3. Place a ruler along the other side of the set square to form a right angle as shown.
The line must be fixed.
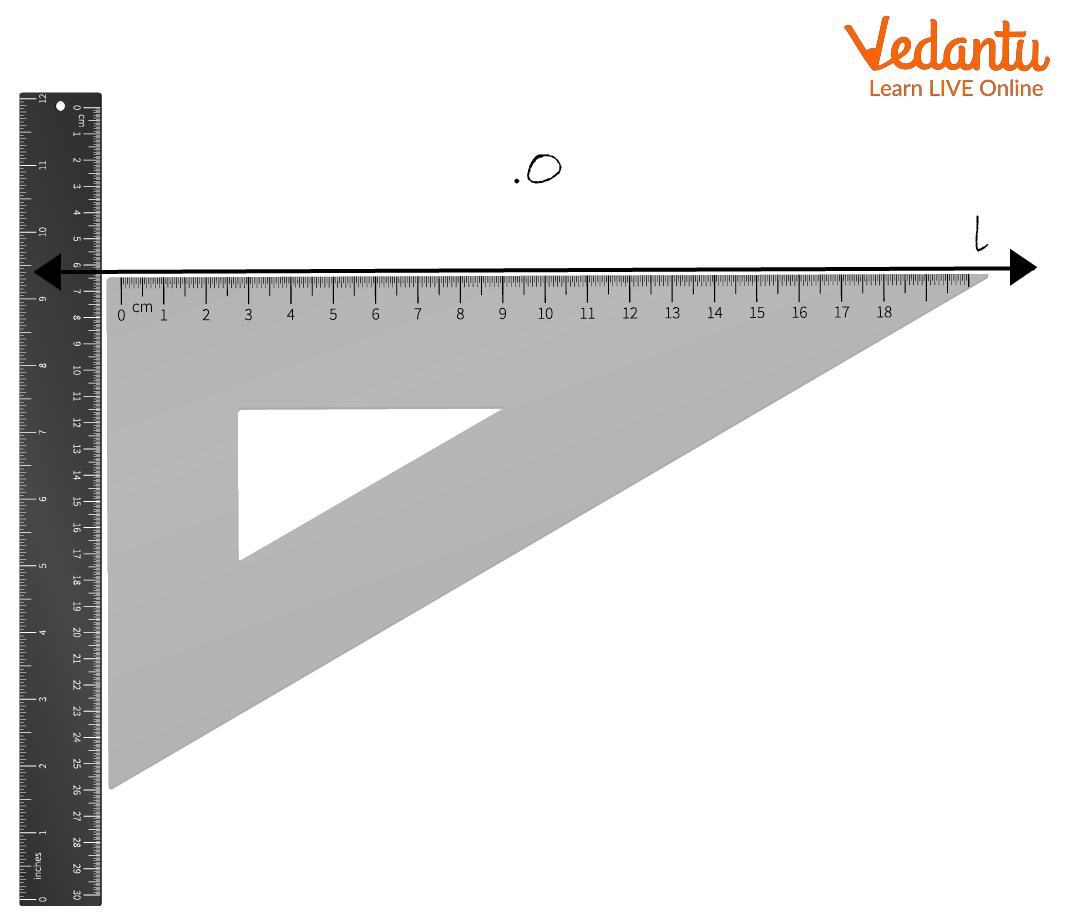
Place a Ruler Alongside
4. Slide the set square along the ruler upwards such that point O lines along the arm of the set square.
5. Remove the ruler and draw a line along the given line. Name this line m.
m is the desired line parallel to l. m|| l.
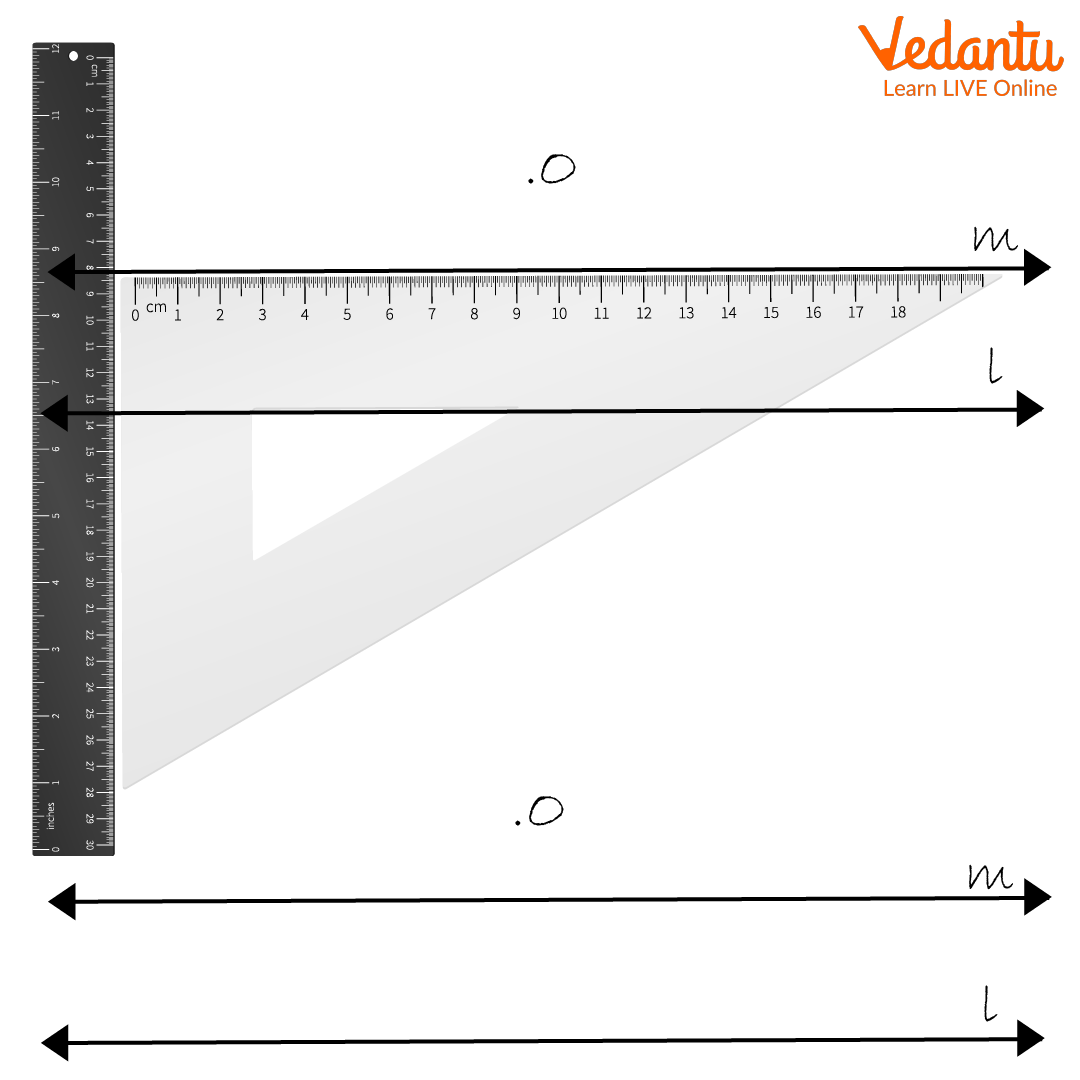
Drawing Parallel Lines
Solved Examples
Using a square and ruler, draw a line parallel to this line way through the 5cm point above.
(i) Use a ruler to draw an \[{\rm{XY}}\] line and mark point A on it.
(ii) Draw \[{\rm{AM}} = 5\]cm using a square.
(iii) Place the given square on the \[{\rm{XY}}\] segment.
(iv) While holding the straightedge firmly along \[{\rm{AM}}\] move the rectangle along the straightedge until the edge of the rectangle touches point M
(v) Draw a line \[{\rm{MN}}\] along the edge through M.
(vi) \[{\rm{MN}}\] is the desired line from M parallel to \[{\rm{XY}}\].
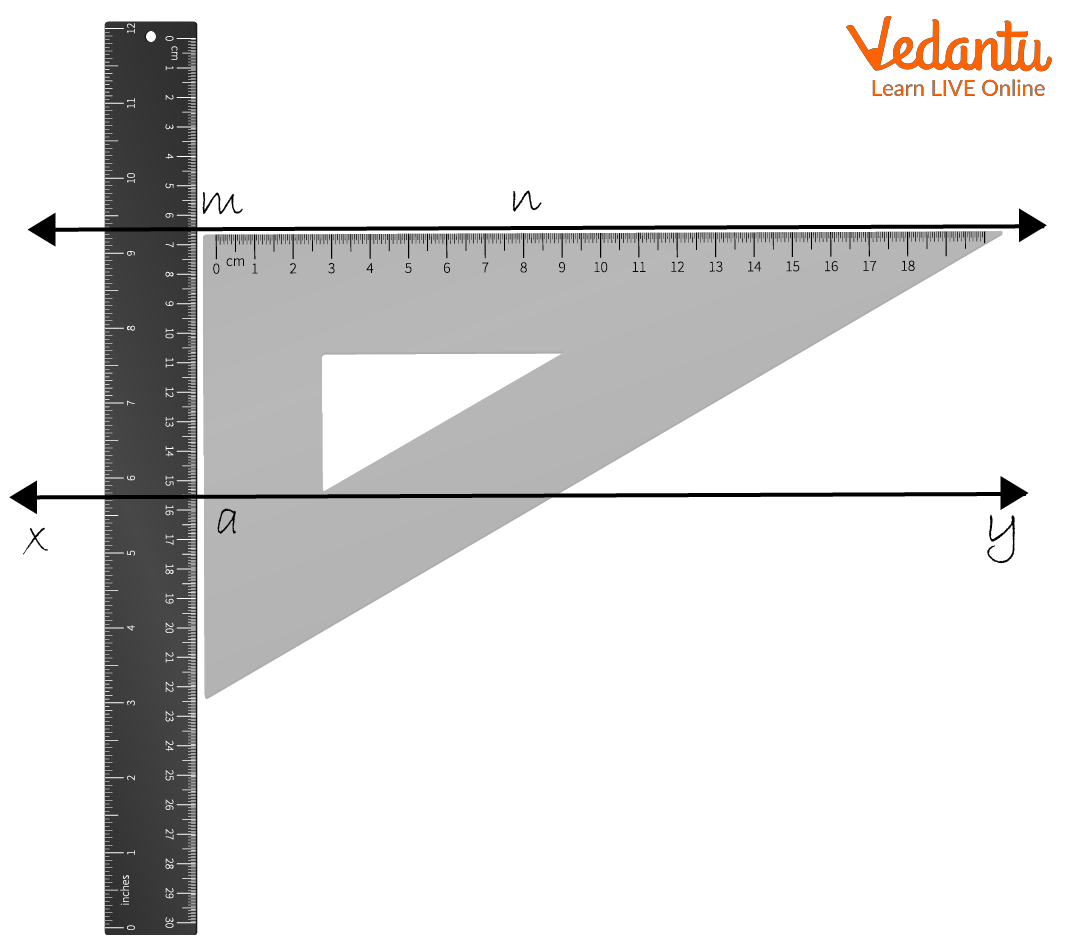
Drawing Parallel Lines
Conclusion
The cross-arm of a T-square, which is typically perpendicular to the paper and is oriented at a specified angle, or another solid, level bottom line, must be placed on one side of the desired angle. Then, it's common practice to mark off with a pencil or pen the other edge of the agreed angle.
FAQs on How to Draw Parallel Lines Using a Set Square
1. What is drawing parallel lines with a set square?
Drawing parallel lines with a set square is the method of constructing a line that stays at a constant distance from another line using a set square and a ruler. Parallel lines never meet and have the same direction. In this method, one edge of the set square is aligned with the given line, and the set square is slid along a ruler to draw a new line that is exactly parallel to the original line.
2. How do you draw parallel lines using a set square step by step?
To draw parallel lines using a set square, align and slide the set square carefully along a ruler to maintain the same direction. Follow these steps:
- Draw the given line using a ruler.
- Place one edge of the set square along the given line.
- Hold a ruler firmly against another edge of the set square.
- Slide the set square along the ruler to the required position.
- Draw the new line along the same edge of the set square.
The new line formed will be parallel to the original line.
3. What instruments are needed to draw parallel lines?
To draw parallel lines accurately, you need a set square, a ruler, a sharp pencil, and paper. The ruler acts as a guide while sliding the set square, ensuring the direction remains unchanged. Using proper geometry instruments improves precision and neatness.
4. Why do we slide the set square while drawing parallel lines?
We slide the set square to maintain the same angle and direction as the original line. Sliding along a fixed ruler ensures that the edge used for drawing does not rotate. This guarantees the new line has the same slope and remains parallel, meaning the distance between the lines stays constant.
5. How do you check if two lines are parallel after drawing?
Two lines are parallel if they never meet and the distance between them remains constant. You can check by:
- Measuring the distance between the lines at different points.
- Placing the set square along one line and verifying the other aligns perfectly.
- Ensuring both lines have the same direction or slope.
If these conditions are satisfied, the lines are parallel lines.
6. Can you draw parallel lines without a set square?
Yes, parallel lines can be drawn without a set square by using a compass and ruler or by measuring equal distances at multiple points. For example:
- Mark equal perpendicular distances from the given line at two points.
- Join the marked points using a ruler.
However, using a set square is faster and more accurate in basic geometry construction.
7. What are the properties of parallel lines in geometry?
Parallel lines have special geometric properties that define their behavior. Key properties include:
- They never intersect, even if extended infinitely.
- The distance between them is constant.
- Corresponding angles formed by a transversal are equal.
- Alternate interior angles are equal.
These properties are widely used in angle and line geometry problems.
8. What is the difference between parallel lines and perpendicular lines?
The main difference is that parallel lines never meet, while perpendicular lines intersect at a right angle. Specifically:
- Parallel lines have no intersection point and maintain equal distance.
- Perpendicular lines meet at an angle of 90°.
Both concepts are fundamental in geometry constructions using a set square.
9. What are common mistakes when drawing parallel lines with a set square?
Common mistakes occur when the set square shifts or rotates while drawing. These include:
- Not holding the ruler firmly in place.
- Allowing the set square to tilt while sliding.
- Using a blunt pencil causing unclear alignment.
To ensure accurate parallel line construction, keep the ruler steady and slide the set square smoothly.
10. Where are parallel lines used in real life?
Parallel lines are widely used in real-life structures and designs where equal spacing is required. Examples include:
- Railway tracks
- Road lane markings
- Notebook lines
- Edges of rectangular objects
Understanding how to draw parallel lines with a set square helps in technical drawing, engineering graphics, and architecture.